Just a few more details on how to update different settings. Let's look at the steps:
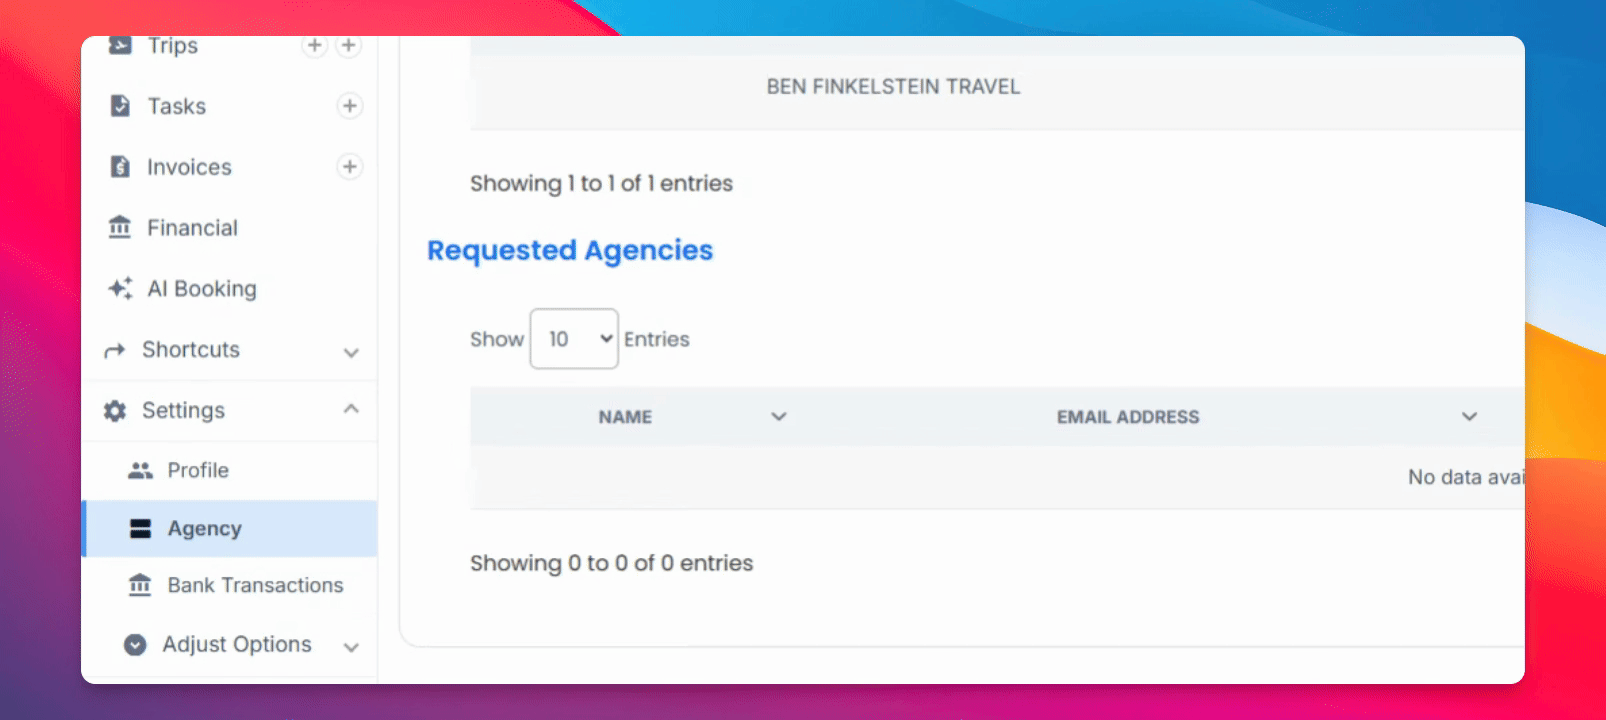
Step 1: Select Agency
On your agency settings, head over to the navigation bar and simply select Agency and select the pencil icon to edit.
Here you'll be able to adjust the email address associated with the account, as well as the name, and add your agency logo.
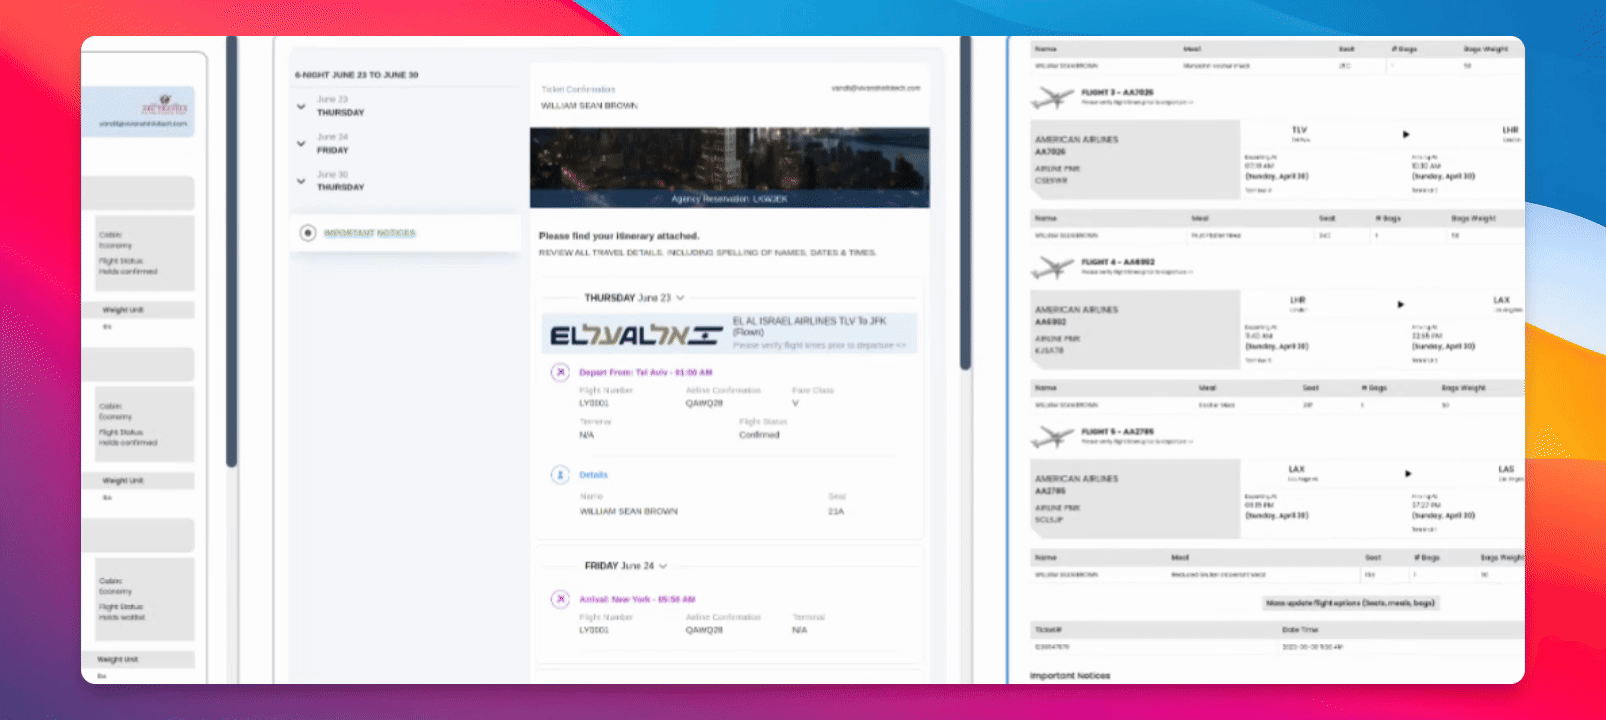
Here you'll be able to choose the layouts for your trip confirmations. You have a standard view, more of an itinerary style that shows you chronologically how it's done, and another setting here that shows it in a different layout.

Step 2: Choose Default Layout
You can choose any of these as your default, just don't forget to click Save and you'll be able to update it according to your needs.