Let me show you how to add your vendors in Yaalago. Before getting started with the platform, you'll want to set up your vendors in Settings — everything else builds on this foundation. Let's walk through the steps:
Step 1: Navigate to Vendor
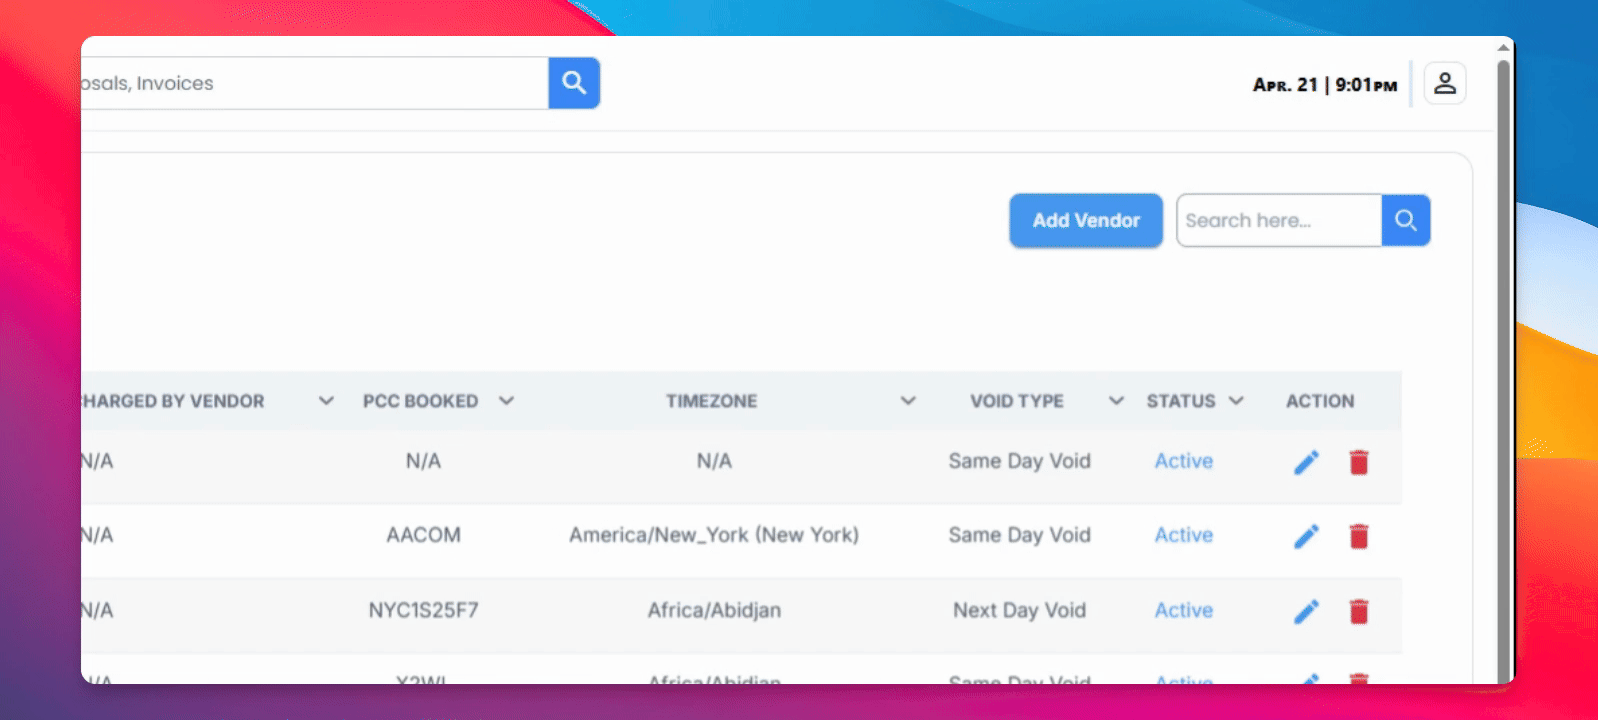
In Settings, scroll down and click on Vendors.
Step 2: Add Vendor Information
Fill in all the relevant details for your vendor, including:
Name
Email
PCC (the PCC where trips will be booked)
Time Zone
Status
Void Type
Step 3: Review Vendor List
Once saved, your vendor will appear in the list below. You can return here at any time to review or edit your vendors.
Now that your vendors are set up, the next thing you'll want to do is configure a commission structure for each one.
Commission structures determine how splits and payments are calculated, and they can only be built on top of the vendors you've already added. This is why it's strongly recommended to add all your vendors first, before doing anything else in the platform.
For GDS bookings, the system will also display the PCC associated with the booking, allowing you to identify and apply the correct commission automatically. We'll cover all of this in the next video.