In this tutorial, we will discuss how to manage invoices effectively. Invoices are essential for sending receipts and payment requests to your clients. Let's look at the steps:
Step 1: Create an Invoice
If you stack on a bunch of different options onto one invoice for people who pay at a later date, you can either select the plus icon and enter it through here, or you are able to just go ahead into the trip and create an invoice directly from a trip.
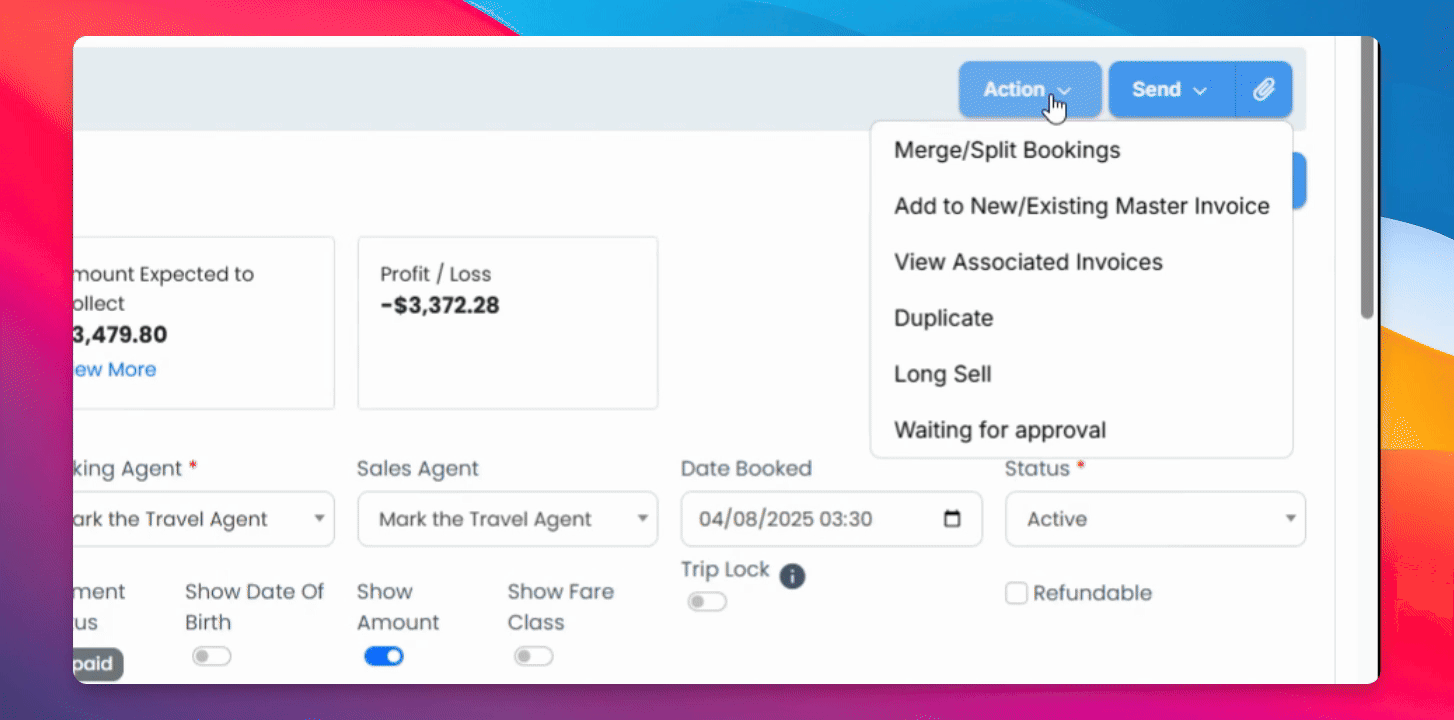
Step 2: Add to Invoice
Once the trip is selected, go to the Action tab and add to a new or existing master invoice.
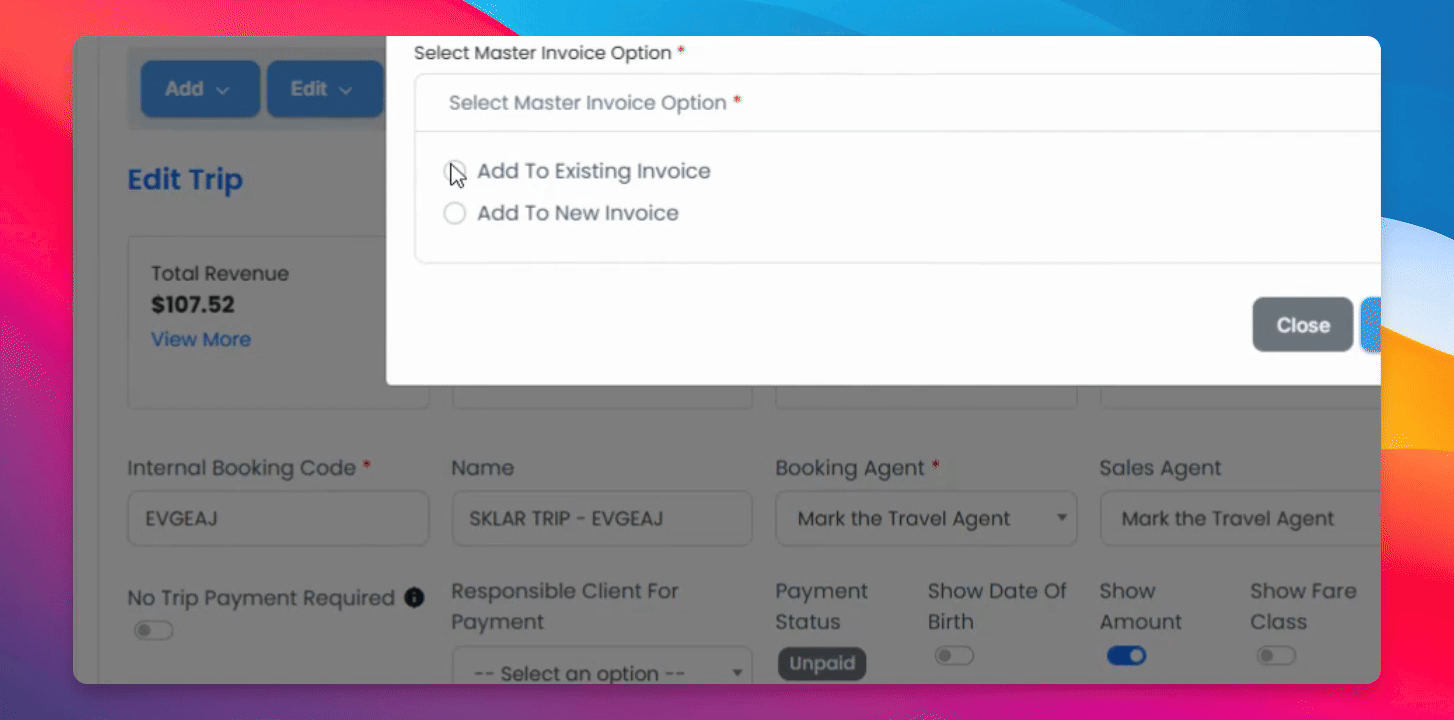
Step 3: Select Tickets
Here you will either suggest an existing invoice or a new invoice, then select either select all for all the tickets or manually select the tickets that you'd like.
Step 4: Submit Invoice
Then submit the invoice.
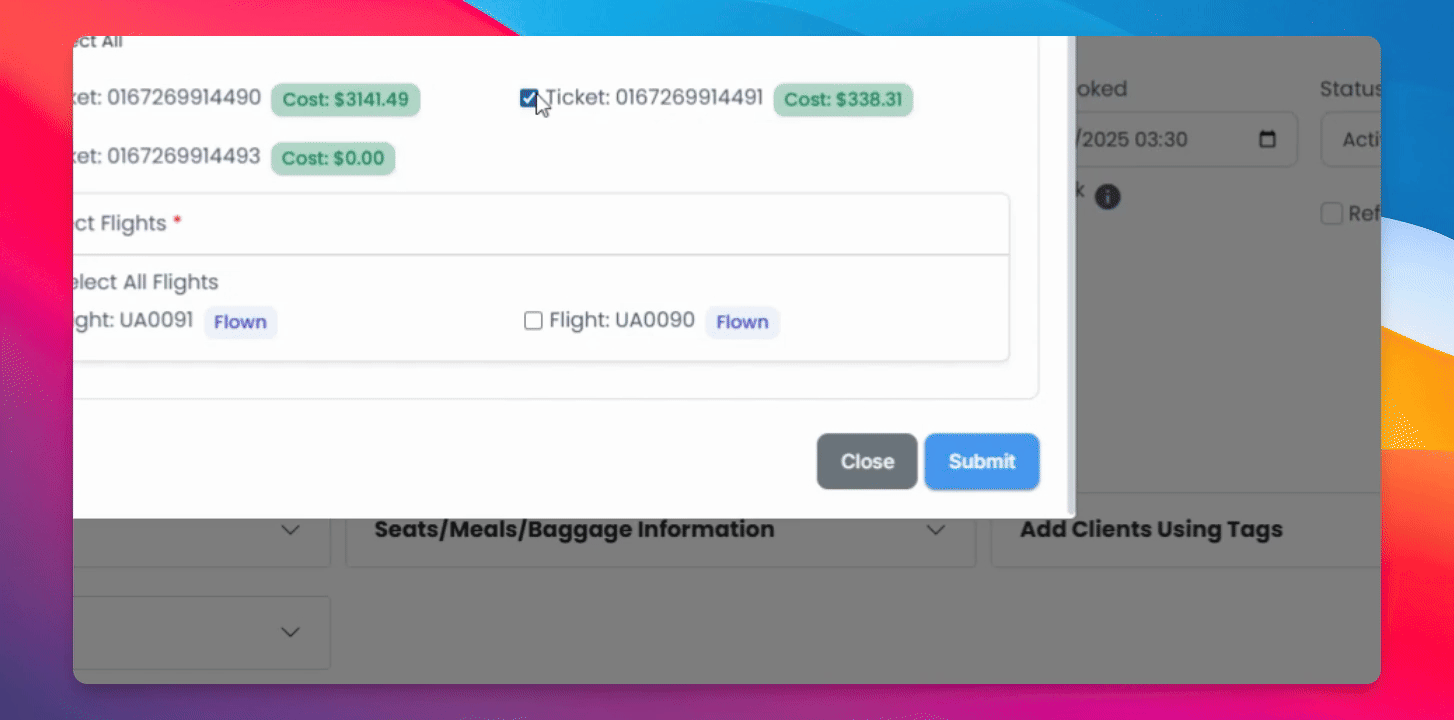
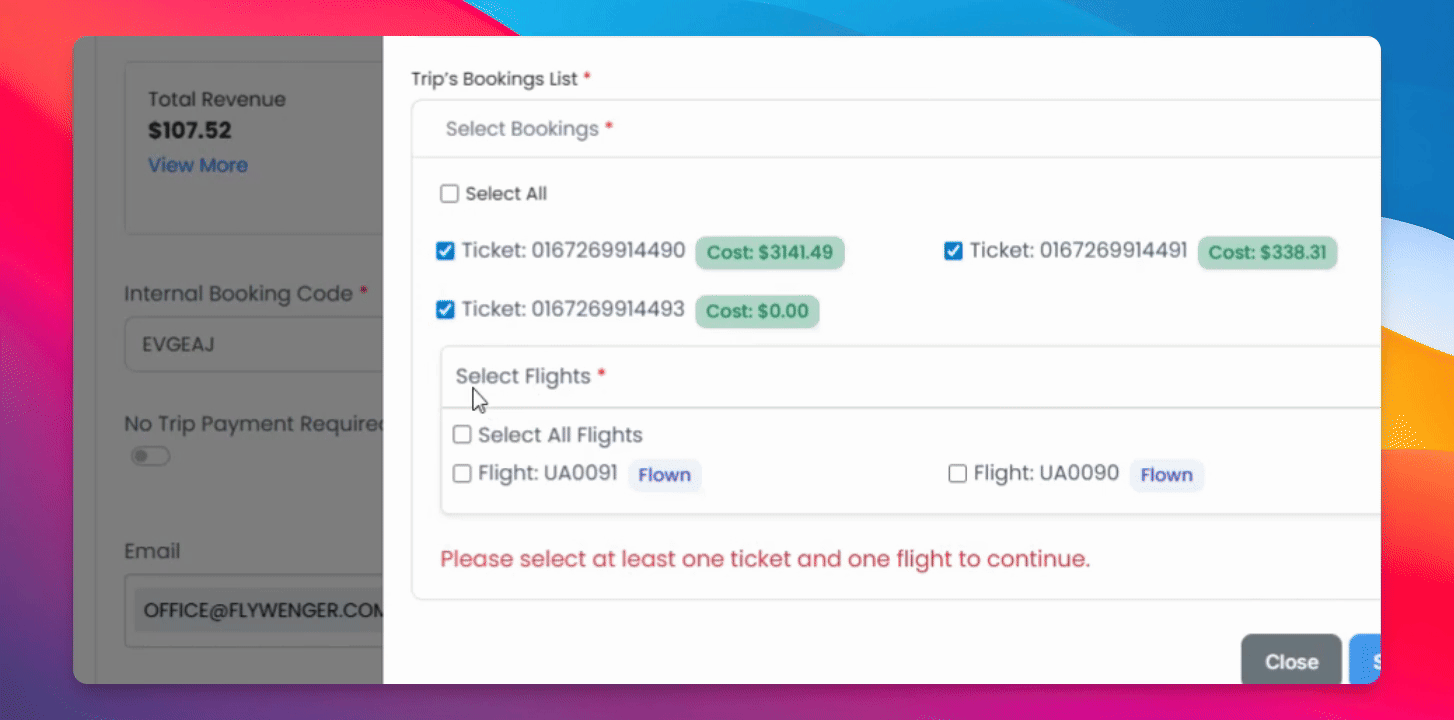
Step 5: Select Flights
Make sure to select flights and submit.
Step 6: Review Invoice
Once submitted, the system will generate a beautifully organized invoice that shows all the information below.
Step 7: Enter Invoice Details
Enter an invoice name as well as a specific client that it's for.
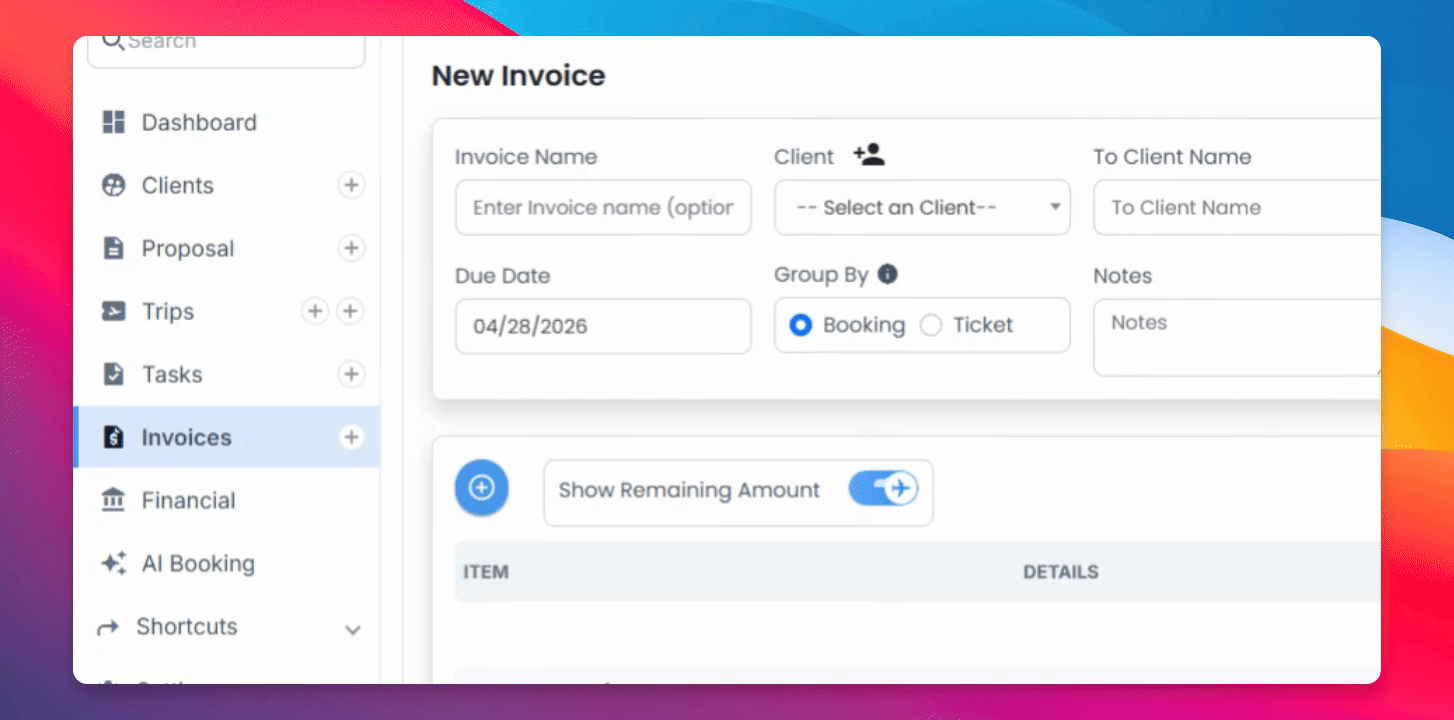
Step 8: Additional Options
Select the client that the trip is for, as well as email the due date, group it by booking or ticket, or add any specific notes.
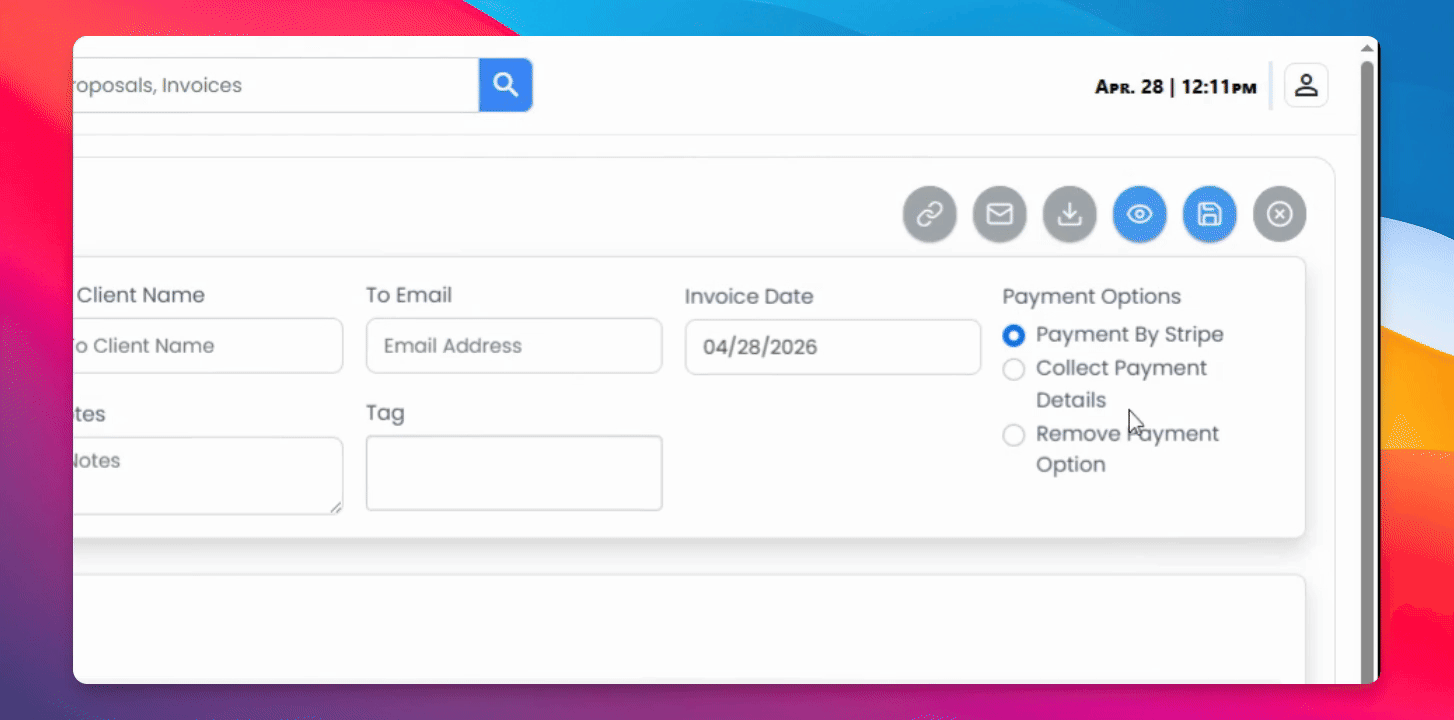
Step 9: Payment Options
Select the payment options that you would like to receive, and once you have reviewed it, don't forget to save.
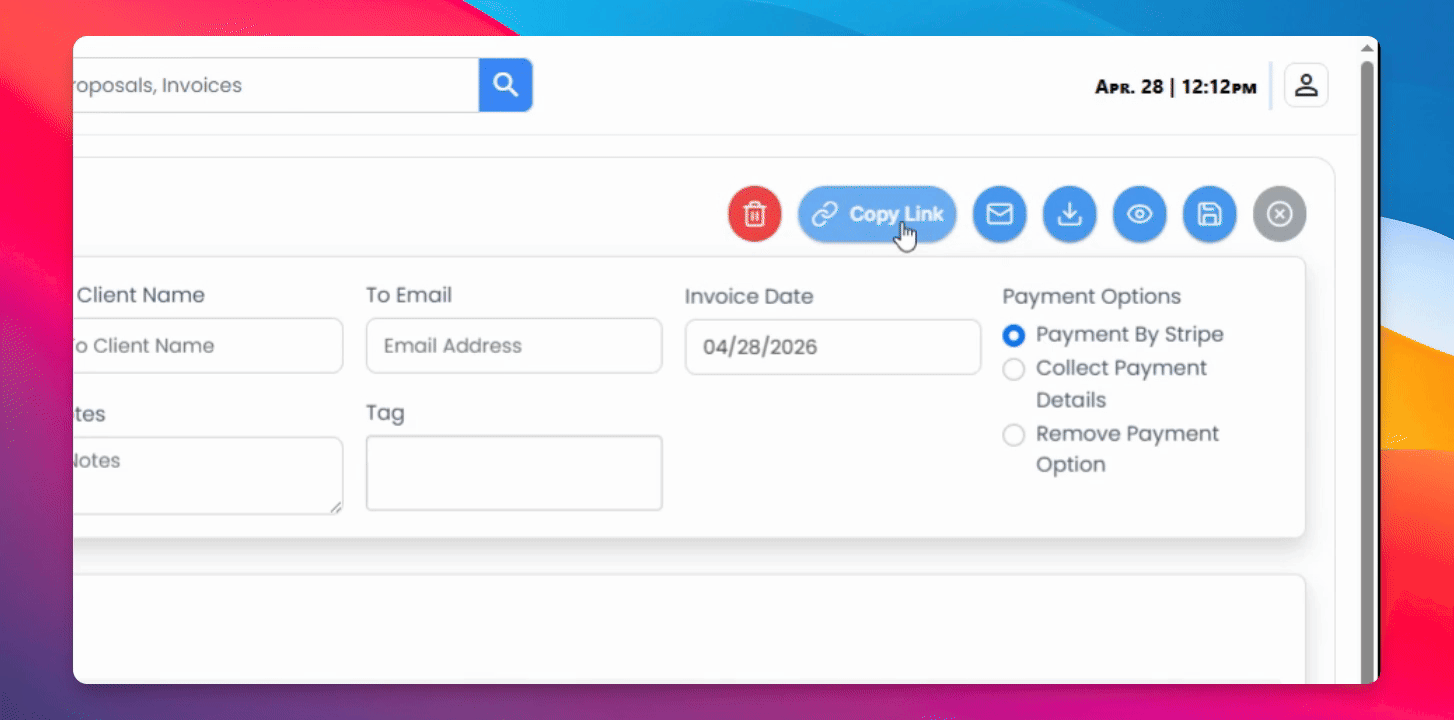
Step 10: Share Invoice
Once saved, you'll be able to share it by copying a link or sending it by email.
Step 11: Final Review
Add any information that you'd like down below and make sure that it's all correct.